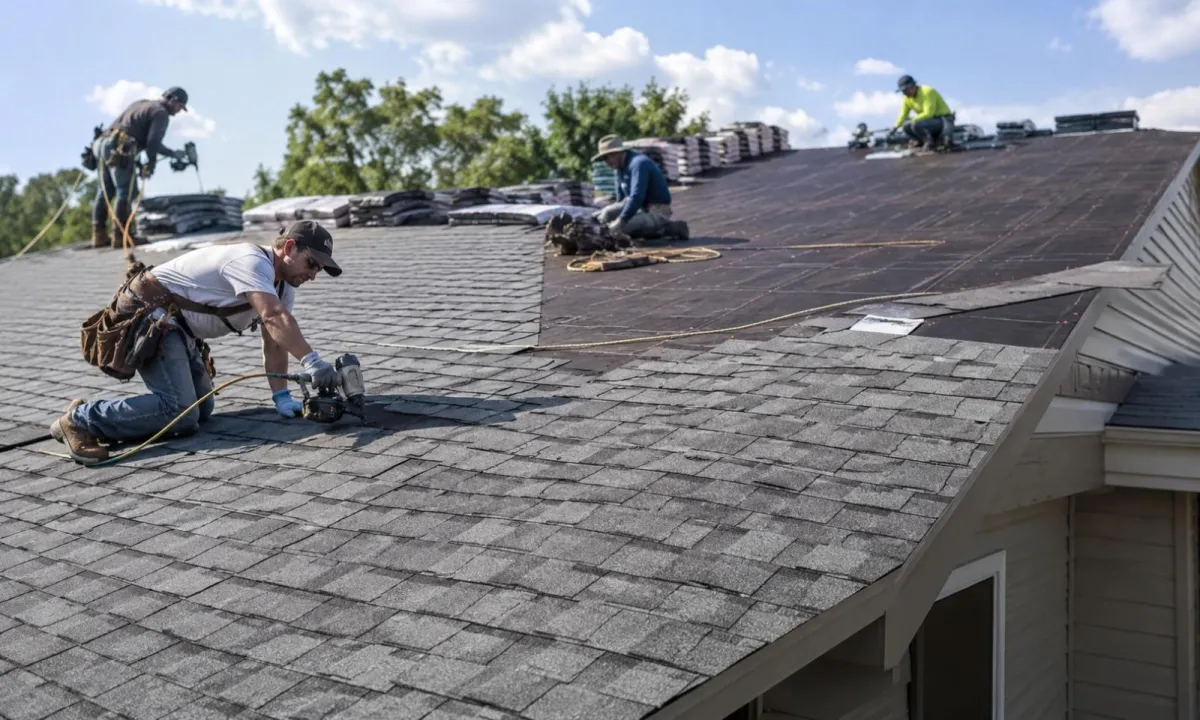
The Roof Installation Process Step-by-Step: What Rochester Hills Homeowners Can Expect
Replacing a roof is a major home improvement project, and knowing what happens before, during, and after installation can make the experience much easier. For Rochester Hills homeowners, the roof installation process typically involves several important stages, from removing the existing roofing to inspecting the decking, installing protective layers, laying the new roofing material, and completing the final cleanup.
While every roof is different, understanding the typical sequence can help you prepare your home, recognize what your roofing contractor is doing, and know what to expect on installation day.
Here is a step-by-step look at the typical roof installation process.
Roof Installation Timeline at a Glance
A typical residential roof replacement may take anywhere from one to several days, depending on the size and complexity of the roof, the materials being installed, weather conditions, and whether repairs are needed.
A typical installation timeline looks like this:
Day 1: Preparation and tear-off
Day 1: Roofing decking inspection and repairs
Day 1–2: Underlayment and ice-and-water shield installation
Day 2: New roofing material installation
Final stage: Flashing, ventilation, inspection, and cleanup
The exact schedule can change because of weather, unexpected decking damage, roof design, or material availability.
Step 1: Preparing the Property
Before the actual roofing work begins, the crew will prepare the work area.
This may include protecting landscaping, siding, windows, doors, and other areas around the house. Roofing contractors may also position tarps, protective equipment, ladders, and debris containers around the property.
Homeowners should remove fragile items from walls or shelves in the attic and upper levels of the home. Roofing work can create vibration, particularly during the tear-off and installation stages.
Your contractor should also confirm where materials will be delivered, where vehicles and equipment will be placed, and how debris will be removed from the property.
Good preparation helps keep the project organized and reduces the risk of unnecessary property damage.
Step 2: Tear-Off — Removing the Existing Roof
Once the work area is ready, the crew typically begins by removing the existing roofing material.
This is known as a tear-off.
During a tear-off, workers remove old shingles and other roofing materials until they can properly inspect the roof underneath. Depending on the existing roof system, this may also involve removing old flashing, underlayment, vents, and other components that need to be replaced.
Tear-Off vs. Overlay: What's the Difference?
Homeowners sometimes hear the terms tear-off vs overlay when discussing roof replacement.
A tear-off means the existing roofing is removed before the new roof is installed. This allows the contractor to inspect the underlying roof decking and address problems that may otherwise remain hidden.
An overlay, sometimes called a roof-over, involves installing new shingles over an existing layer of roofing.
Although an overlay can sometimes be appropriate depending on the roof's condition and local requirements, a complete tear-off provides an opportunity to inspect the roof deck and build the new roofing system from the proper foundation.
Your roofing contractor can determine which approach is appropriate based on the existing roof, its condition, the number of existing layers, and applicable building requirements.
Step 3: Roofing Decking Inspection
After the old roofing has been removed, the contractor can inspect the exposed decking.
The roofing decking inspection is one of the most important parts of the installation process because the decking forms the structural surface beneath the roofing system.
Contractors look for signs of:
Water damage
Rot
Soft or weakened wood
Cracking or splitting
Mold or moisture-related deterioration
Areas that are no longer structurally sound
If damaged decking is discovered, those sections may need to be replaced before the new roofing materials are installed.
This is one reason an accurate roofing estimate can sometimes change after tear-off. Some damage cannot be fully evaluated until the existing roofing material has been removed.
Replacing damaged decking helps provide a solid surface for the new roofing system and can prevent problems from being covered up during installation.
Step 4: Installing the Underlayment
Once the decking has been inspected and repaired as necessary, the roofing crew installs the protective layers that go beneath the shingles or other finished roofing material.
One of these layers is the underlayment.
Underlayment provides an additional barrier between the roof decking and the finished roofing material. Depending on the roofing system, contractors may use synthetic underlayment or another approved product.
Proper underlayment installation helps protect the roof deck from moisture and provides another layer of defense beneath the shingles.
The installation needs to be done correctly, including appropriate overlaps and fastening, so water is directed away from vulnerable areas rather than toward them.
Step 5: Installing Ice and Water Shield
For homes in Rochester Hills and throughout Michigan, weather protection is an especially important consideration.
An ice and water shield is a specialized water-resistant membrane designed to provide additional protection in areas that are particularly vulnerable to water intrusion.
When discussing ice and water shield in Michigan, roofers commonly focus on areas such as:
Roof edges
Valleys
Around chimneys
Skylights
Roof-to-wall transitions
Other areas where water can collect or where ice dams may create additional pressure
Michigan winters can bring snow, freezing temperatures, and repeated freeze-thaw conditions. Properly installed ice-and-water protection can help strengthen vulnerable portions of the roof assembly.
The exact areas requiring this protection depend on the roof design, local requirements, manufacturer specifications, and the contractor's installation practices.
Step 6: Installing Flashing and Roof Components
Before or during the installation of the primary roofing material, the crew will address important components around roof penetrations and transitions.
Flashing helps direct water away from areas where the roof meets another structure or where something penetrates the roofing system.
This can include areas around:
Chimneys
Skylights
Plumbing vents
Walls
Valleys
Roof edges
Proper flashing installation is critical because these transition points can be vulnerable to leaks if they are not properly sealed and integrated with the roofing system.
Depending on the condition of the existing components, some flashing may be reused while other components may need to be replaced.
Step 7: Laying the New Roofing Material
Now the new roof begins to take shape.
For an asphalt shingle roof, installation typically starts at the appropriate roof edge and progresses upward according to the manufacturer's specifications.
Each course of shingles is positioned and fastened in a specific pattern. Proper alignment, fastening, spacing, and exposure are important for both the appearance and performance of the finished roof.
The exact installation method depends on the roofing material.
Homeowners may choose from options such as:
Asphalt shingles
Architectural shingles
Metal roofing
Other specialty roofing materials
The roofing material should be installed according to the manufacturer's instructions and applicable building requirements.
Step 8: Ridge, Ventilation, and Finishing Details
As installation progresses, the crew completes the roof's finishing components.
These may include ridge caps, ventilation components, flashing, pipe boots, drip edges, and other details required by the particular roofing system.
Roof ventilation deserves special attention.
A properly designed ventilation system helps manage heat and moisture in the attic. Your roofing contractor should evaluate the existing ventilation and determine whether improvements are necessary as part of the roofing project.
The goal is not simply to install new shingles. A properly installed roof is a complete system consisting of the roof covering, underlayment, flashing, ventilation, drainage, and supporting components.
Step 9: Final Inspection
Before the project is considered complete, the contractor should inspect the finished roof.
The inspection may include checking:
Shingle alignment
Fastener placement
Flashing
Roof edges
Valleys
Ridge caps
Ventilation components
Pipe penetrations
Areas around chimneys and skylights
Overall workmanship
Any visible issues should be addressed before the crew leaves the property.
Homeowners should also have an opportunity to ask questions about the completed roof, warranties, maintenance, and any recommendations for future inspections.
Step 10: Cleanup and Final Walk-Through
Roof replacement creates a significant amount of debris, so cleanup is an important final step.
The crew should remove roofing debris from the work area and clean up around the home. Many contractors also use magnetic tools to help collect loose roofing nails from driveways, walkways, and other accessible areas.
The contractor may then complete a final walk-through with the homeowner.
This is a good time to confirm:
The installation is complete
Debris has been removed
Any agreed-upon repairs were completed
Warranty information is provided
Questions have been answered
The homeowner understands any maintenance recommendations
A professional installation should leave you with both a finished roof and a clear understanding of how to care for it.
How Long Does a Roof Installation Take?
The roof installation timeline varies from one project to another.
A relatively straightforward residential roof replacement may be completed in a day or two, while larger or more complicated projects can take longer.
Factors that can affect the schedule include:
Roof size
Number of roof sections
Roof pitch
Architectural complexity
Extent of decking damage
Roofing material
Weather
Availability of materials
Required repairs
Inspection or permitting requirements
Weather is particularly important in Michigan. Rain, strong winds, snow, or unsuitable temperatures can delay roofing work to protect both workers and the quality of the installation.
Your contractor should provide an estimated schedule before work begins and communicate any changes if unexpected conditions arise.
What Should Rochester Hills Homeowners Do on Installation Day?
There are a few simple ways homeowners can make roofing day easier.
Keep vehicles out of the work area
If possible, park vehicles away from the house and work zone so the crew can access the property and safely move materials and debris.
Protect fragile items indoors
Roofing work creates vibration. Consider removing fragile objects from walls or securing items in the attic and upper floors.
Keep children and pets away from the work area
Roofing involves ladders, tools, debris, and materials. Children and pets should stay away from the active work zone throughout the project.
Keep communication open
Make sure you know who to contact if you have questions during the installation.
Prepare for noise
Tear-off and shingle installation can be noisy. Homeowners who work from home may want to make alternative arrangements during the loudest portions of the project.
A New Roof Is More Than Just New Shingles
Understanding the roof installation process helps explain why professional installation involves much more than placing new shingles over an old roof.
A complete roofing system may include:
Decking → Underlayment → Ice & Water Protection → Flashing → Roofing Material → Ventilation → Final Inspection
Each component plays a role in protecting the home from Michigan's changing weather conditions.
A properly completed installation also gives the contractor an opportunity to identify hidden problems, correct damaged decking, improve vulnerable areas, and make sure the new roofing system is installed on a sound foundation.
Ready for Your Roof Installation?
If your Rochester Hills roof is approaching the end of its service life or has sustained storm damage, understanding the installation process is a good first step.
A professional roofing contractor can inspect your existing roof, explain whether repair or replacement makes sense, identify any underlying problems, and provide an estimate for the work.